Thursday, 24 October 2013


Monday, 21 October 2013
Preliminary Task Evaluation.
 |
| The camera which we used to film our preliminary task |
In terms of planning, our group was fairly organised in ensuring that we had all props and costume ready in order to film. We filmed our preliminary task in our own time and we made sure that we had recorded all footage that we needed before the deadline. As a group we came up with idea's together and brainstormed them on to paper. However, our idea's were too complex for the task we had been set so we had to change our ideas quickly to something more simple- an interview. We created a script for the scene of dialogue in order to know what to exactly say for the scene.
Our storyboard was not very effective in terms of helping us with the filming. This was because the storyboard did not match up to the way we ended up filming. So, what we did was create the storyboard after we had filmed the footage so we knew exactly what to draw and write on to our storyboard.
The camera was easy to use once we had figured out how to use it. In order to create steady shots we used the tripod for certain parts of the filming, however most of the shots were filmed without the tripod. We could have used the microphone for filming the dialogue scene to have created a clearer sound.
Whilst filming, we did not come up with many problems. The only problem was that the room which we filmed the interview in was extremely small so it was difficult to film properly. To overcome this we had to re arrange the chairs and other furniture in the room.
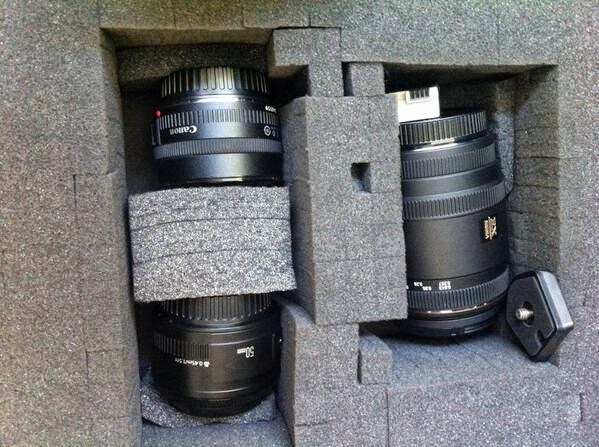 |
| The different camera lenses |
From using the Apple Macs Final Cut Pro for editing our film, I learnt that creating a continuous fragment of film takes a lot of editing, cutting and a lot of time. Every lesson we worked on a specific part of our footage. I learnt how to insert transitions where appropriate in our film, we used dissolve and a blackout frame. We used transitions to create more effect in our film and to make the most of the editing software. Final Cut Pro allowed us to remove certain sounds that we didn't want in our footage and then we were able to overlap the visual footage that we used on to the sound that we did want. Something that I struggled with, was making some cuts able to flow but eventually I figured it out. We needed to 'shrink time' in our film, so in order to do that, we added a fade effect to show the passing of time. We did this to ensure that our film did not drag on too much. I found that it is better to have a short perfected film rather than a long, poorly edited film.
 |
| Editing on the Apple Macs- Final Cut Pro |
If I were to do this task again, I would have spent more time in planning everything out exactly how I want it to be in order to save time in the long run and therefore film effectively in the way I intended. I would also spend more time editing the film, like staying after schools or lunchtimes if needed. I would also make sure I have lots of footage to work with so it is not so difficult to cut and I wouldn't be wasting time by re filming parts.
I think that our group worked quite well together as a whole particularly in planning and organisation. In the team, I acted in the film yet did not film anything and I helped edit the film. At the beginning we all contributed our ideas and then decided as a group what we wanted for our film. We managed our time well and ensured that we met up outside of lesson time to film and discuss anything that we needed to go over.
Tuesday, 15 October 2013
Analysing The Lion King film. (Theory)
 Some camera shots, angles and movements displayed throughout the film:
- Lots of establishing/long shots to show the exact setting the scene is in. Example: shots of dark places= Where Scar the bad character is.
- Low angle shots were used when Mufassa( the king) is on top of the cliff to show his authority over the kingdom
-Lots of close up shots were used to portray characters emotions across to the audience, eg: fright and anger
- Zoom shots were used a lot throughout the film usually in scenes of danger
- In order to set the location of the film, iconographic scenery of wilderness, exotic animals and plants were used to present that the film is set somewhere in Africa.
Sound:
- The music throughout the film matches the tone of the goings on. It adds effect to the characters emotions.
- Some of the music is diagetic, as the characters actually sing at certain parts
- The use of echo indicates loneliness and isolation
Mise en scene:
- The cliff is the place of most importance as it is above everything else and only the good main characters go on to it.
- There is a significant theme of light vs dark throughout the movie. When Scar(bad character) is present, he is always in shadows which reflects his character. Also Scar's appearance is very sharp and evil in comparison to others.
 - Mist is used in scenes of danger to create a spooky effect
- The story is a cyclical narrative
- Scenery is always natural throughout the whole film
- The colours are vibrant which represent the African theme
Editing:
- Continual
- Transitions: dissolving in to different stages of Simba growing up in order to shrink time
- Slow motion effect while Scar and Simba fight to make the scene more dramatic and over the top
Thursday, 10 October 2013
Common features of continuity editing.
 |
| Establishing Shot |
Establishing shot:
This is used at the beginning of films and at the beginning of some scenes. This allows the audience to know where the action is happening.
Shot reverse shot:
 |
| Shot Reverse Shot |
180 degree rule:
 |
| 180 Degree Rule |
Mise en scene
Mise en scene is a French term which means what is put in to a scene or frame. Whatever is put in or left out really does have a big effect in terms of the signals the scene is giving out. For example; a tree can made to look nice on a sunny day with bright green leaves and children playing underneath it. On the other hand, a tree can be made to look threatening if it has no leaves and the weather is dark. These different types of mise en scene are important in portraying a general mood/atmosphere in a scene. These aspects will add to our understanding as an audience to what is happening in the film or what may lie ahead in the upcoming scenes.
Elements to consider in mise en scene:
- setting and props
- costume, hair and makeup
- facial expressions and body language
- lighting and colour
- positioning of characters/objects within a scene
Tuesday, 8 October 2013
Editing for our preliminary task.
Taking in to account what we learned in our theory media lesson, I applied my learning in to editing my preliminary film task. I learnt that even in a really short scene, a lot of shots are needed because it can be difficult to create good continuity if you have very few limited shots. Everything in editing and film shooting takes a lot of detail and precision so my group and I will ensure to present that through our task.
Processes included in editing a film.
In today's theory media lesson, we learned about the directors and editors task in producing a professional looking final film. The directors role is to film as many shots as possible of each scene so the editor has a lot of footage to chose from. It is better to have too much footage than have hardly any footage to work with in editing. The editor must decide what footage they want to work with and which footage that they do not want to work with. Once that is completed, they must organise the chosen shots in to a coherent whole. Then the editor must make sure that shots follow on from each other and work for the audience for them to see a continuous story.
Building blocks:
-Editor looks at all individual shots available to create a particular scene
- The film script can be used as a guide to help to construct the scenes how they should be
- The scenes should be a continuous series of shots that show a moment that flows
- Sometimes it is possible to shoot a scene in a single shot if the take is appropriate and flows very well
- A sequence is made up of different scenes which fit together to present the story/narrative
- Finally after all these processes re editing of the film will be completed
A key term called 'continuity editing' means that the audience cannot notice good editing because the film is just so continuous.
Some common features used in editing:
- Establishing shot.
- 180 degree rule.
- Filming same scene but from different angles
Some transitions:
- Straight cut.
- Dissolve.
As a class we discussed how using lots of cuts in one particular scene can create a dramatic and snappy effect. For example, in horror movies when something bad is occurring.
Thursday, 3 October 2013
Editing our preliminary task
In today's lesson, my group and I continued with editing our short film. We watched through all of our film footage to begin assembling a final piece (on Final Cut Pro). I noticed that continuity is extremely important in films, everything must be just right in each take in order for the scene to flow. We realized that our footage has continuity problems. This means that we need to film certain parts again and this time make sure that they will have continuity. In order to make this work, we discussed and noted down the exact parts that we need to film again and how we would film them to produce good continuity. We also discussed how aspects such as lighting and clothing need to be exactly the same as in our other footage that we have. Another thing we need to include and show clearly is the 180 degree rule which we will be filming tomorrow. By taking all aspects in to consideration, this will hopefully help us to create a professional looking short film.


Setting and props in a film.
In Tuesday's Media lesson, we looked at analysing still images to see what the setting and props can communicate to the audience. The setting of a scene in a film is usually very detailed than that of a theatre.In terms of the process of film making, filmmakers can start and create their setting from scratch or an actual location can be found and altered if needed to suit the film. Props are also very important to the film as they can suggest the genre and time period of a film. For example if the film is set 70 years ago, the character may have a prop such as a type writer instead of a laptop which would be used in a modern day set period in a film. Props can suggest someones identity/job, for example a doctor would be in a setting which includes items which doctors use on a regular basis as part of their job. A key term that I learnt is 'incongruous', this means that something doesn't fit in with every thing else at all in a film.
Subscribe to:
Comments (Atom)